I enjoyed playing around with the leaves and bleaching them onto fabric, I think it worked even better than doing it on paper, more like doing it on tissue paper and removing that colour. I created a dyed green fabric and decided to bleach this back and see if it just removes the colour.
The method for this is to use a SYNTHETIC brush (I learnt my lesson after my natural bristle brush ended up without any bristles left) and paint the back of the leaves using bleach, I have used bleach and a bleach-water mixture, they both seemed to do the same just I think some fabrics could not handle the undiluted bleach. I then printed these leaves onto the dyed fabrics and flattened it with a book to get an even spread. Then removed the leaf and watched it develop. They actually turned quite orange which I did not expect but the effect of it is good.
I had done a little bit of felting with the wool tops I had, but thought about a more natural colour to try and use. I went for a walk around my field and in the woodlands and managed to find sheep wool on trees and fences, so I collected a ball and brought it home. As this was just a sample to try, I was not too concerned with washing it, I would have to research what to do if I wanted to turn this wool into something that would not smell or be a little dirty from mud or trees.
I did a close up of the wool to show the texture, it obviously gets wet and dries a lot from a sheep and being just out in nature, which is the start of the felting process anyway. But the next step is to pull the wool apart into thin strands and lay it down on some bubble wrap, first doing a layer of it facing one way, then a layer of it on top facing the other way. A horizontal layer and a vertical layer, keep going it depends on what thickness you want the felt to turn out like. I did about three to four layers which will produce a thin sample here, which I thought would work better for producing a nice bonded sample.
This is what it looks like when the layers are stacked up, try and make it into the best kind of shape you want to produce.
Next, add some soapy warm water into a jar or something and pour a little onto the felt, then fold the bubblewrap over on top of it and start rubbing it with circular motions, this will start to bond the layers together and fuse the fibres.
This is a long task, sometimes I will keep going for 15-20 minutes if I want a really well fused piece, if you want more holey results then do it for less time. If you want to try and achieve neat edges, fold all the little straggly bits over using the bubblewrap and rub those edges particularly to fuse those together. I usually then pick it up in my hands and rub it together with my palms, again making sure the edges are sorted.
You then rinse it under cold water, which I learnt ‘shocks’ the felt, and lay it out to dry.
I found a little bit of dissolvable fabric when I was looking for something completely different, but I decided to give it a go as I was working on some 3D kind of leaves anyway.
I made sure to go over the stitching multiple times and imagine it as layers which overlap it and tie it all together, I then dissolved it, which took longer than I thought and I honestly thought the video was going to be more satisfying. The end result is quite nice but simple, I could carry on and try something more complex with this I think as it could end up being a fun piece that could work well in a pattern or a 3D kind of placement piece.
The next pattern I wanted to try out was a half drop, meaning halfway down the tile, it repeats again, making a more interesting tile and harder to spot where the repeat is happening.
I use a technique where I take an existing basic tile repeat and turn it into a half drop, this method does not need it to be done that way but it is a quicker way to try it out.
Again here I create a square canvas, using 2000 x 2000 again just to keep it even which can be less confusing.
Create a 1000 x 1000 pixel box, this is exactly half the width and height of the canvas, if the canvas was a larger or smaller size you need to work out exactly what half of this would be. This needs to be in the middle of the page, someone with a newer photoshop may be able to just do this and know its in the centre by the way it moves there, mine does not do this, so I need to set some guidelines to help me.
These guidelines are created in View then New Guide, I add guide at half the canvas both ways, and a quarter of the canvas both ways too. I can now move my box, using the two quarter lines I know this is now in the middle of the page. Now I need to rotate the box, this is where the halfway marks come in handy.
So to do this I hold Ctrl and T to open the free transform on the shape, I then hold down shift and rotate it, holding shift makes it click evenly as it moves, so I let it tick to the diamond shape seen here. Then I can remove the guidelines, and pull the opacity of the square down a little.
I then go to my tile piece and highlight over all the layers and duplicate them to my half drop tile, scaling them down too will be useful to fit it roughly in the box. Now I just need to delete the motifs that are cut in half, and move a few things around to keep it more in the square, sometimes if I have a true tossed design I just rotate the whole square to the side to match the diamond.
So after some shuffling this is what I did, most of the design fits into the diamond shape here and anything hanging off the end may fit quite nicely into the repeat, it is a wait and see at the moment here because there is room for tweaking the pattern later on. Next I highlight over all of the layers here that are over the diamond (not the diamond) and right click on them, and convert them to a smart object. This flattens the layers into one essentially, but you can still enter them and expand them to move things around.
So I duplicate the layer in the exact place, as I will be using numbers in the offset menu, I drew roughly what I will be creating with all the extra layers. I name my layers to keep track of them, so we have Middle Top, Middle Bottom, and Tiny left and Tiny Right which are the smaller little triangles around the edge of the canvas. The Top Left, Top Right, Bottom Left and Bottom Right are the larger squares.
I first click on the Middle Top layer, and Filter, Other, Offset it, then drag the slider until I like the position of it. I have overlapped some motifs here but I know that once I remove or move one of those it will look a lot better. Make a note of the number as your vertical number, it is much easier for this to be a nice even number, This was 1150 for example, which will make it much easier to halve later when we need it. So the offset figure appears as -1150, the minus comes in because it is above that centre original group, so when we do the one below, it will just be +1150 as we need to replicate it the same. Similarly when we do the side pieces, the minus figure will be to the left of the centre piece and plus figure to the right.
So this now shows the Middle Bottom layer has been offset too, just as a positive version of the vertical number used to offset the Middle Top. Essentially what they is doing is slowly taking a layer off of the centre ‘pile’ of layers, until we just have one left and everything is done in the right place.
Next we are going to work out the Top Left layer, which will simply give the figures to fill in the rest of the layers very easily. First you need to divide your vertical number by two, we need to know the halfway point between that number and the centre of the canvas. so 1150 divided by 2 is 575 and for it to be above the centre in the top left box is needs to be -575. Then we just play around with the horizontal slider this time, finding the perfect position, again keeping in mind to use an even number for simplicity.
I chose 890 as my horizontal number, again here you can some problems occuring like a gap between the two white hares and also having those two white hares so close to each other, but this can be altered later. So the Top Left layer was placed here by using the -575 vertical value and my chosen -890.
For the Top Right layer, this just needs to be changed from negative to positive on the horizontal value, so instead of -890, it should be +890.
This is how it looks now, so to do the Bottom Right layer now, just the vertical number needs to be changed from negative to positive, making it +575, as we still want it to be half of the original vertical number to keep it in that half style.
Then finally, to fill in the final large gap, the horizontal number needs to be changed again from + to -890.
This may look complete now in some designs, but there are still two layers in the pile on top of the centre piece, called Tiny Left and Tiny Right, if you look at the first image where I drew the rough guidelines, the little triangles on the left and right need to be filled. To do this, you need to take the horizontal number used, and double it, 1780. As we do not want to move vertically, the vertical number should be set to zero in the offset menu, and the horizontal should be -1780 for the Left, and +1780 for the right.
After I place these last two layers, I then remove the square in the background, I like to work with this to know where my edges are still, but removing this now you can see where the overlaps and gaps are. To fix these, we go into the smart object of the middle layer, you just double click the tiny square in the corner of the layer in the layers panel.
We then see this, anything I move in here, will be moved in all of the other layers in the main design, so if I delete a motif, it will be deleted too. This is now a little bit of trial and error in moving things around and seeing if they work, this layer opens as a new tab so you can go back and see which motifs you need to change, however you cannot see the preview in real time, you need to close down the new layer tab and save it, which then moves everything around in the pattern.
So now this took a few tweaks going in, saving, and then going back in as I was going along, but I do now like the look of this, the final step is to define the pattern, which cannot just be done by clicking Edit, Define Pattern, because the edges of this canvas is not the repeat, we need to use the vertical and horizontal numbers to define this. So we need to use the rectangle marque tool to select the right amount of the design, when you click this, the bar at the top changes, and there is a style option which you can change to fixed size, you can then enter the exact values in here and just click on the canvas and the perfect box will appear. So the values need to be the ORIGINAL vertical number, not the halved one as the height of the rectangle, and the original horizontal number doubled as the width. So it will be width = 1780 and height = 1150.
You can faintly see the box here, check around the edges for the repeat, like I can see here the fox’s ears are cut off at the top and just poke through down the bottom, and there is also a fox’s ear on the sides that I can see seem to match up. From experience, a visual check is enough here because if you go wrong, it is a little more noticeable and will usually be more drastically different. Now with this selected, we can click Edit and Define Pattern. I usually then create a canvas that is exactly the same as the rectangular marque, and paint bucket the pattern in, because I think have a perfectly tile of it, you could also choose to crop the design to this rectangle as a final step.
So firstly I am showing the basic tile repeat I did here, this is the design that I started the design from as well by copying it into the half drop tile.
These next two show the half drop, using the same size canvas as the basic repeat first then trying to match the kind of scale in the next one. Because of the rectangular marque defining the pattern in the end, the tile is not as big as the basic repeat so there will be a big difference in scale. Overall I am happy with the kind of designs that I can create with my techniques here, but hope to keep expanding this knowledge with the help of online classes.
I wanted to document my processes on how I make a repeat, it was something I learnt quite late really using Photoshop as my primary application, although I did have a go with illustrator too. Photoshop is my preferred method because I have managed to make it a quick and easy process for myself.
I start off by creating a square canvas which will be my grid, I tend to go for a 1000 x 1000 pixel grid or 2000 if I am working for pattern contest as it effects the preview of my design when I add to for the contest.
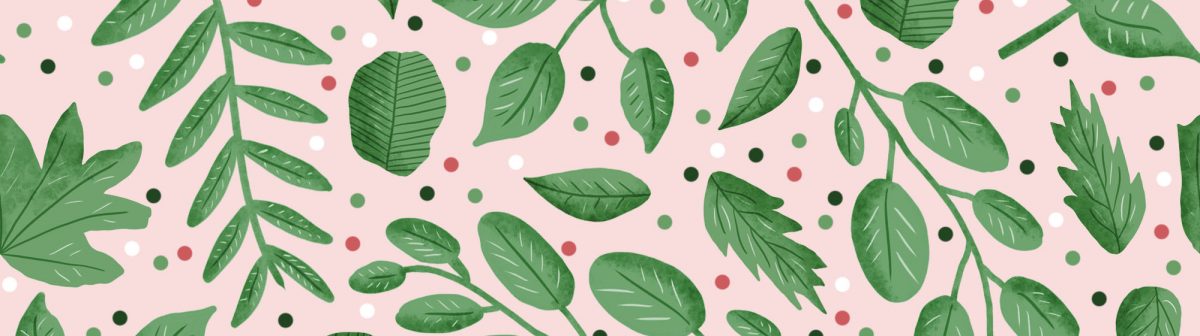
I then add the motifs that I want to use into the tile, and separate them into little groups, so I have a couple of different hare designs, a couple of foxes, some trees, pinecones, and leaves. These can also be utilised as flipped motifs, just flipping the design can change the effect of it and make it look like a different motif. I am going to be going for a busy hero design in this example.
First of all I sort out my edges, so hang some motifs over the edges, being careful that they do not form a straight line down the side of the tile, so you can see the fox is only missing a tiny bit of tail but the hare is missing half a body. I sometimes will put a motif right in the corner but on this occasion I think I could do without it. If a piece is put in the corner it must be repeated into each of the corners.
The next step is to repeat the designs on the other side of the tile, so that when several of these tiles are put above and below it, they will all link and look seamless. So I click on one of the motifs, usually starting from the top side piece, and duplicate the layer, this puts an exact copy of this motif in the same place. I then select the copy, and go to Filter then Other then Offset. This will move the motif to where you want to for you, which is great for precise numbers. Because I want it to go exactly the same height at the other side of the tile, I need to use the horizontal control on the offset. Because my canvas was 2000 x 2000, I need that motif to move 2000 pixels to the right. This now shows the part that is missing from the motif on the left, coming in from the right. This process is repeated for all the motifs on the side, then the ones along the top. Watch for any overlaps or bad looking placement at this point, because they do have to be done again to ensure both of the matching motifs are in the same place. I use the set to transparent option on the offset menu, as if I let it wrap around, I get a weird glitch where the motifs think the canvas is larger than it is. I used to make repeats by putting my motifs in the middle of the screen then offsetting them as wrap around objects, so the motifs would literally be split into two, which did make it harder for me to play around with placement.
I then fill in the rest of the motifs in the gaps where I see them fitting, this is a lot of resizing, playing around and fitting things in. You can see I repeated the hare but flipped it so it looks a little difference. Usually I would go a lot smaller with my motifs to make a bigger repeat, so the repeat will not be so linear and obvious.
I the use very small motifs such as tiny leaves or little texture marks to fill more of the negative space, this just makes for a really nice busy image which is what I like to go for. I would probably usually have some motifs a little smaller and larger than the leaves, but I did not draw a massive range of motifs for this pattern as it was for a single pattern for the design contest based on Canadian Wildlife. I did enjoy this pattern though so I created some coordinating patterns to go with it. This is the point where I would also add a background colour to the bottom background layer.
Then I would click Edit, and Define Pattern, which adds this tile to the pattern section, which can be found in the Live paint bucket tool. It would be saved as a 2000 x 2000 pixel pattern, so you would need a 4000 x 4000 canvas to show the pattern repeated one time fully.
So I opened a 4500 x 4500 canvas and used the live paint bucket tool to put a pattern onto it. So this has repeated the image 1 extra full tile and a quarter both across and down from the top corner of the canvas.
I am happy with these designs and I like how they look, the method I use is good for me as I have learnt shortcuts to streamline it and feel like I can get a good repeat this way.
I decided to watch some tutorials on Skillshare and take some classes to learn to make the most out of Procreate, as it is a media that I use a lot and I am sure there are so many tips and tricks for using it more efficiently. One thing I have seen is using an Alpha lock, this means that the layer is locked on the shape you have created, so no strokes can be added outside of that area, this was really useful when I wanted to add a darker shade to the edges of the leaves and blend it out, without loosing that sharp edge I had drawn. This was really helpful and just meant that I did not have to go through a long process of working on a really small scale or rubbing out the edges around the motifs.
So I also followed a tutorial for creating burhses, as the watercolour brushes selection on there is not as good as it could have been, so I followed a tutorial to make my own, and learn how to make them so I could try and experiment with my own creations too.
The Painting Brushes
So firstly you need to bring up the brush panel and click the plus sign in the right hand corner of this.
The New Brush page
The first step is to choose a shape and grain for your brush, and this will make all the difference to the final result. For the Shape for watercolour I went with a circular kind of design, and looked through the grain for one that looked watery and stained to me, because the watercolour brush they supply on here, just does not look like watercolour.
The Grain Shapes
By clicking ‘Swap from Pro Library’ it takes you to all this preset brush grains and shapes to choose from.
Editing the Brush
Next, you go through each of the bottom panel sections, choosing variables on the stroke, shape, grain, dynamics, pencil and general, which just edits how the stroke looks and how it behaves with different pressures and movements. The strip at the top shows how it will look. The important thing to see is on the dymanics here, giving it a glazed or wet look completely changes the outlook of it and shows up a lot more texture which I think was a great trick to know how to do.
Editing the size
Editing the pencil pressure here you can see what editing the size does to it, it gives it this nice tapered edge so it can end in a more realistic way.
The Final Brush
So this is what I ended up with, it is not perfect and it can be a case of playing around with the sliders to achieve what you want to, but I think I am heading in the right direction here for the kind of watercoloury effect that I want.
I previously did a little painting with hot wax directly from a candle, but I thought about actually drawing with the non lit candle on a white surface and then painting over it to reveal the image. There is an element of luck and unpredictability with this because it is quite a quick technique as you have to remember where you have drawn already.
The Candle
So you draw a motif in the candle, which on the white will not show up at all really so it does need to be quickly to remember where you have drawn. Then paint a watery layer of watercolour over it, I found before doing undiluted Indian ink was too thick and dark to always resist the wax.
First Attempts
This shows some examples of it, the top one you can actually see where I did the first centre line in the middle of the motif, and as I did the leaves going up the sides I lost where the centre line was and you can see it does go off of it a little.
Overall though it was quite fun, I would try taking this a little further in the future I like by using a thinner candle, I think the results are similar to the idea of a bleach pen, which I might also try making to get better effects with the bleach.
When I do stippling, I tend to work out where I want the dark and light areas on the piece first and then go for it. I also decide whether I want to follow a picture or something as a source, or make it up to be more the same.
The Outline
I started the linear outline, and decided I want the darker bits to be along those lines, so having the centre and edges of the leaves darker and those empty spaces left lighter. Stippling is built up using dot work, so more dots where you want darkness and fading to very little dots where you want more white space.
A Timelapse of the Drawing
I decided to do a timelapse to show my drawing technique, you can see it is quite random and I do switch things up as my arm gets tired or a get bored of a particular spot. All in all I think this took around an hour to do.
Completed piece
The completed piece did turn out quite well, I do think that maybe it would have been improved if I had turned the centre into more of a blank vein then with the dense darkness coming away from this, rather than just having this dark dip in the middle. As I went for a more graphic approach with this over it being realistic anyway I think this could have been a little more detail to improve it.
I think the most accurate way of getting the leaf skeleton is taking a print directly from it, so I thought about doing some rubbings of them.
First of it I got some leaves out of the garden yesterday, so by this morning they were quite crispy and I figured this would be better.
The Leaf
So I usually work on the underside of the leaf because it has a stronger outline on it. Just add the paper you want the rubbing on on top of the leaf, making sure there are no awkward folds, this was another advantage of leaving it overnight, it had seemed to calm down a little with the folding.
Oil Pastels
I just got some simple oil pastels as I think the consistency of them would make for the best impression. Kids do this a lot and I remember rubbing coins and things when I was younger and we would just use crayons, so I think an oil pastel is quite close to this.
The Rubbing
Draw over the paper with the leaf underneath, I tend to go sideways over the veins as it picked up more of them, especially with this particular leaf but it could be different with a different leaf.
I decided to play with lino again and make motifs out of it rather than a placement piece that could have been continued.
Drawing on the Lino
The first step is to sketch out the design on the lino, I decided here that I was going to carve out the leaf skeletons, and then actually cut out the shape of the leaf so I had a nice clean stamp effect with the finished lino piece.
Carving
I tried to use a mixture of widths in the lines to give a more realistic kind of effect to it, I was following the more natural flow of a leaf skeleton rather than uniform it more into a pattern.
The End Result
The end result here is interesting and I think the veins look good, the next step was to just cut around the edges of the leaves to make it into a stamp.
All Cut Out
The designs here were cut out, I used a simple pair of large scissors to do this as it was quite tough to get through.
The First Prints
The prints produced were interesting, I will probably do another post when it gets to creating some fun patterns out of them.