I ordered some fabrics from Fashion Formula with a few of my patterns on, I ordered three in little samples and the hedgehog print and a squirrel secondary in fat quarters.
As per a little aim on my brief, I wanted to add some stitch to a couple of them to see how this would look.
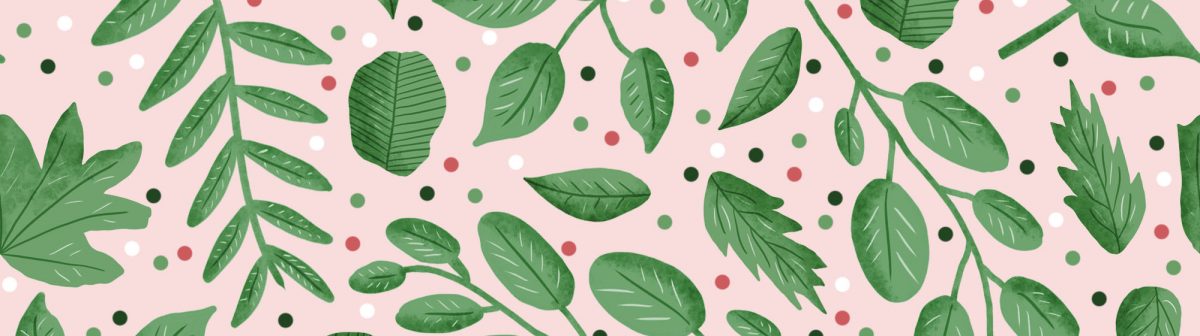
The fabrics as they came
I loved how vibrant the hedgehog print came out, and I thought I would love to make that into a proper cushion cover to see how that would look.
Stitching on a couple of samples
On the leaf print I outlined the green leaves with a single line of stitch, which I think is pretty and makes it stand out a little more. Then on the mushroom print I tried completely blocking out a yellow and green mushroom to see how this would look. Overall I think the outline worked better but I do think they work nicely as purely printed designs, which could be added to a little depending on product if it was suitable. The small scale of the print and the actual sample meant the blocked out ones did not look as neat as they could of. I think to improve the outlining I could have tried quilting to raise the shapes off of it a little.
The cushion
The cushion also worked out well and I think the scale looks pretty perfect for the size of it, I would love to do some more of these to put onto Etsy or something too. Overall I think getting them printed onto fabric was a good idea because it helps to show the colours even better than the paper printouts did, and how the colours behave on the various fabrics. This was just a poly panama as I wanted something quite light and airy, which I think was effective here.
I was excited to see my designs on a larger range of things after doing a few that I found online, I collected what I needed, notebooks, a mug and coaster, some more stationery, even a phone case, and I managed to create some simple mock up images from these by setting up a little white light area. I think these kind of images show the patterns very well against a white background and I think this is probably how I would show them on a product listing too.
I first had a go at some notebooks here, which was great because it has given me a chance to put different patterns together and see how they work together. I also had a pen and pencil in some images that I think look good with a little blender design to go onto them. The advantage of doing my own mockups means that I can arrange them right, I can open the notebook or anything else and get the best images that I need. So I did open a notebook and put a blender on the inside cover and a light blue page with a placement design sat in the corner which I think looks cute.
I next tried some images using a mug and coaster, a pen holder and some notebook together which I think looks quite good together. They all work as good giftware items which is exactly what I want my collection to be. I think overall the mockups are great and have made me think more about what I want to ensure my patterns do, this includes scale, colourways, and I think I can look into editing designs now to make them exactly what I want them to be.
I am constantly on the lookout for contests to do, I enjoy it as well as getting more of my work out there and seeing what patterns etc are successful. The Wraptious contest is designing for cushions and art prints, two products that I would actually love to create using my own designs, so this was a perfect chance to do just that, using five designs that I am quite proud of.
The designs are shown on the site by displaying them on mockups on the framed prints and cushions. I decided to include the hedgehog hero design, I think it is very effective with its bright colour and half dropped design. The red squirrel placement is cute and I think works well on a cushion and an art print, I also used a secondary from the red squirrel collection with the bright foliage, and then I looked at my contest designs, the ice lollies and British owl designs I think look great on products, I havent seen them on products due to just doing them for flat patterns so this was great to see.
The contest is judged on votes via facebook likes and shares, an update if anything happens.
I just finished submitting my entry for the Spoonflower Large Birds contest, from which I also created a little collection of coordinating designs from. I also posted one last week for the Quiet Spaces category too.
I have started to notice now that my designs are getting more engagement as the weeks go on, usually each post doing better than the last which is exciting because it must mean I am refining my style and doing something right. I could go back to the start of them and notice little problems in the first couple of patterns, such as the Pastel Cafe one, was too pastely, it needed some more dark in the design to add more of a colour balance into it, which I did struggle with a little in the foliage coordinating designs from the Large Birds one, I used a lot of dark browns in the birds so the lighter blues and pinks in the actual pattern were good being lighter, but I do wish I had made some a lot darker, as I much more often than not choose a light background for my designs.
Quiet Spaces Entry
I used some similar plant pots for the Pastel Cafe design challenge weeks and weeks ago, so I took some inspiration from them and kind of repurposed them with newer techniques I have learnt on Procreate, such as easily adding pattern and shading to motifs. I originally had a wite background on this design and I think it looked better in the blue, but there is not much white at all in there and something is not quite right with the colour balance I think. I was working hard last week on my sketchbooks and I left this one a little later than usual, but overall I am happy with it as a simple repeat.
The Large Birds contest was one I thought a lot about with the content, I floated some ideas with my friends in a groupchat, penguin, peacock, eagle, all good options but I was not particularly excited about any of them. I started looking in some of the bird books we have around the house, they come in handy when spotting weird birds in the garden and for situations like this. The bird pages have facts about wingspan, sometimes having the birds flying next to other popular ones to compare sizes. This is when I noticed how big the snowy owl actually was, and looking at some of the other species I noticed they were not that much smaller either, such as the long eared and short eared owls, the tawny owls were bigger than I thought, I thought they were tiny!
Anyway, I love owls and how recognisable they are, and very attractive birds that have been on trend before, and just seem to be one of those patterns that does not go out of fashion, but I knew I wanted to go with my more graphic digital painting approach to get some texture and detail into it. I created blue and pink foliage around it because I thought about how my colour palette is usually involving a lot of greens because I use a lot of nature in my work. I actually really like the foliage secondary designs I created, but I do think they do not look like they go perfectly with the owl design by itself. I did try and correct the colour balance using some space filler dots, which I think worked out really well to add more colour in the designs.
The next contest I believe is Ice Cream Truck, so I think for that one I want to try and go really out of the box with my usual colour schemes and try something bold and bright!
The next pattern I wanted to try out was a half drop, meaning halfway down the tile, it repeats again, making a more interesting tile and harder to spot where the repeat is happening.
I use a technique where I take an existing basic tile repeat and turn it into a half drop, this method does not need it to be done that way but it is a quicker way to try it out.
Again here I create a square canvas, using 2000 x 2000 again just to keep it even which can be less confusing.
Create a 1000 x 1000 pixel box, this is exactly half the width and height of the canvas, if the canvas was a larger or smaller size you need to work out exactly what half of this would be. This needs to be in the middle of the page, someone with a newer photoshop may be able to just do this and know its in the centre by the way it moves there, mine does not do this, so I need to set some guidelines to help me.
These guidelines are created in View then New Guide, I add guide at half the canvas both ways, and a quarter of the canvas both ways too. I can now move my box, using the two quarter lines I know this is now in the middle of the page. Now I need to rotate the box, this is where the halfway marks come in handy.
So to do this I hold Ctrl and T to open the free transform on the shape, I then hold down shift and rotate it, holding shift makes it click evenly as it moves, so I let it tick to the diamond shape seen here. Then I can remove the guidelines, and pull the opacity of the square down a little.
I then go to my tile piece and highlight over all the layers and duplicate them to my half drop tile, scaling them down too will be useful to fit it roughly in the box. Now I just need to delete the motifs that are cut in half, and move a few things around to keep it more in the square, sometimes if I have a true tossed design I just rotate the whole square to the side to match the diamond.
So after some shuffling this is what I did, most of the design fits into the diamond shape here and anything hanging off the end may fit quite nicely into the repeat, it is a wait and see at the moment here because there is room for tweaking the pattern later on. Next I highlight over all of the layers here that are over the diamond (not the diamond) and right click on them, and convert them to a smart object. This flattens the layers into one essentially, but you can still enter them and expand them to move things around.
So I duplicate the layer in the exact place, as I will be using numbers in the offset menu, I drew roughly what I will be creating with all the extra layers. I name my layers to keep track of them, so we have Middle Top, Middle Bottom, and Tiny left and Tiny Right which are the smaller little triangles around the edge of the canvas. The Top Left, Top Right, Bottom Left and Bottom Right are the larger squares.
I first click on the Middle Top layer, and Filter, Other, Offset it, then drag the slider until I like the position of it. I have overlapped some motifs here but I know that once I remove or move one of those it will look a lot better. Make a note of the number as your vertical number, it is much easier for this to be a nice even number, This was 1150 for example, which will make it much easier to halve later when we need it. So the offset figure appears as -1150, the minus comes in because it is above that centre original group, so when we do the one below, it will just be +1150 as we need to replicate it the same. Similarly when we do the side pieces, the minus figure will be to the left of the centre piece and plus figure to the right.
So this now shows the Middle Bottom layer has been offset too, just as a positive version of the vertical number used to offset the Middle Top. Essentially what they is doing is slowly taking a layer off of the centre ‘pile’ of layers, until we just have one left and everything is done in the right place.
Next we are going to work out the Top Left layer, which will simply give the figures to fill in the rest of the layers very easily. First you need to divide your vertical number by two, we need to know the halfway point between that number and the centre of the canvas. so 1150 divided by 2 is 575 and for it to be above the centre in the top left box is needs to be -575. Then we just play around with the horizontal slider this time, finding the perfect position, again keeping in mind to use an even number for simplicity.
I chose 890 as my horizontal number, again here you can some problems occuring like a gap between the two white hares and also having those two white hares so close to each other, but this can be altered later. So the Top Left layer was placed here by using the -575 vertical value and my chosen -890.
For the Top Right layer, this just needs to be changed from negative to positive on the horizontal value, so instead of -890, it should be +890.
This is how it looks now, so to do the Bottom Right layer now, just the vertical number needs to be changed from negative to positive, making it +575, as we still want it to be half of the original vertical number to keep it in that half style.
Then finally, to fill in the final large gap, the horizontal number needs to be changed again from + to -890.
This may look complete now in some designs, but there are still two layers in the pile on top of the centre piece, called Tiny Left and Tiny Right, if you look at the first image where I drew the rough guidelines, the little triangles on the left and right need to be filled. To do this, you need to take the horizontal number used, and double it, 1780. As we do not want to move vertically, the vertical number should be set to zero in the offset menu, and the horizontal should be -1780 for the Left, and +1780 for the right.
After I place these last two layers, I then remove the square in the background, I like to work with this to know where my edges are still, but removing this now you can see where the overlaps and gaps are. To fix these, we go into the smart object of the middle layer, you just double click the tiny square in the corner of the layer in the layers panel.
We then see this, anything I move in here, will be moved in all of the other layers in the main design, so if I delete a motif, it will be deleted too. This is now a little bit of trial and error in moving things around and seeing if they work, this layer opens as a new tab so you can go back and see which motifs you need to change, however you cannot see the preview in real time, you need to close down the new layer tab and save it, which then moves everything around in the pattern.
So now this took a few tweaks going in, saving, and then going back in as I was going along, but I do now like the look of this, the final step is to define the pattern, which cannot just be done by clicking Edit, Define Pattern, because the edges of this canvas is not the repeat, we need to use the vertical and horizontal numbers to define this. So we need to use the rectangle marque tool to select the right amount of the design, when you click this, the bar at the top changes, and there is a style option which you can change to fixed size, you can then enter the exact values in here and just click on the canvas and the perfect box will appear. So the values need to be the ORIGINAL vertical number, not the halved one as the height of the rectangle, and the original horizontal number doubled as the width. So it will be width = 1780 and height = 1150.
You can faintly see the box here, check around the edges for the repeat, like I can see here the fox’s ears are cut off at the top and just poke through down the bottom, and there is also a fox’s ear on the sides that I can see seem to match up. From experience, a visual check is enough here because if you go wrong, it is a little more noticeable and will usually be more drastically different. Now with this selected, we can click Edit and Define Pattern. I usually then create a canvas that is exactly the same as the rectangular marque, and paint bucket the pattern in, because I think have a perfectly tile of it, you could also choose to crop the design to this rectangle as a final step.
So firstly I am showing the basic tile repeat I did here, this is the design that I started the design from as well by copying it into the half drop tile.
These next two show the half drop, using the same size canvas as the basic repeat first then trying to match the kind of scale in the next one. Because of the rectangular marque defining the pattern in the end, the tile is not as big as the basic repeat so there will be a big difference in scale. Overall I am happy with the kind of designs that I can create with my techniques here, but hope to keep expanding this knowledge with the help of online classes.
I wanted to carry on taking part in the design contests, and the next one is Midsummer Festival, which when I researched, I found I was not getting a lot of ideas aside from flower crowns and the maypole. I chose a simple green and pink colour scheme as it worked well with all the greenery and flowers in the images.
I focused on the flower crowns as bold motifs in this display, I went with a similar method with the people as I did with the East Fork challenge a few weeks ago. I know I am not great at drawing faces and with this kind of graphic style anyway it worked better to leave the face plain to draw attention to the more detailed crown. I added little details like the eyebrows, eyelashes and lips as I think they set the face up with a couple of things in the right place, I also thought they would be the harder things to mess up. I think this design could have included another colour or something, but overall I do like it and the busyness of it overall.