I have been avoiding the business cards for so long, but I finally made a point of sitting down to design it. I went through such a lot of different drafts and things and I am at a place now where I think I could carry on being fussy or I could accept the design. I think I will try and get some opinions to see what others think of it which can help to spot obvious design problems that I may not be able to spot, being so close to it.
Business Card Drafts
You can see here I went through a few stages of placement on the card with the name, title and logo. These were the main things I needed to get on there, and then just trying to get some design elements on there such as a border and a few floral decorations. I ended up taking away the white border and adding the border on the edge of the cards which I think looks better. I kept printing them out too as a wallet print because I think these are close to the real size and I wanted to make sure the writing was clear and readable. The other main decision was the text, I used a font that I use a lot in my work for my name, and then used a clear font on the back for important contact information. So I was debating between these two fonts for the bit underneath as well that says I am a surface pattern designer and artist. I think personally I prefer the clearer font for this, it is a lot more readable and is a good size there. I think I would have to make the other font a lot bigger to get it to the same readability but I would not want to overpower my name.
Final Designs at Present
So these are where I am right now, I think it may be worth asking the actual printers for advice too because they work to design business cards a lot and I think I remember seeing some offers on websites where they can check designs.
I wanted to also design my CV in a more creative way as it had not be updated for a while and was not designed in my style or anything. I also want to send it to someone in the careers department as I have not seen the adviser for over a year now as well.
CV and Business Cards
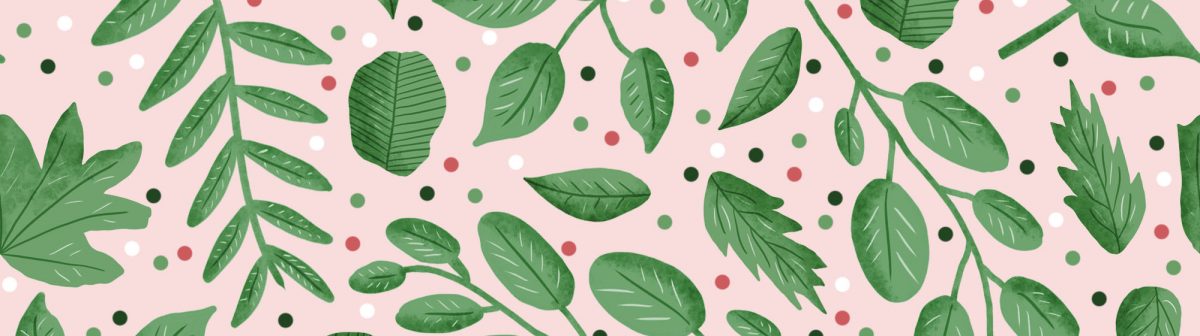
So this is what my CV is up to right now as well, with some of the similar design elements from the business cards. I will probably keep the green and pink colour scheme across my presspack as it is a colour combination I enjoy using, mixing the natural with a contrasting colour, and used it in my consultancy module and will probably take some of those colours into my exposure too.
I chose to take part in the next Spoonflower contest, called ‘Canadian Wildlife’, so the first step was to do a little research and see what kind of animals and trees I could look at. I thought about moose, bears, they seemed a little obvious, and large animals, so I thought I would look for something smaller, which is where I came around the beaver, red fox and arctic hare. I think they worked well because they all have a slightly different colour to them, and with green forest colours I think it gives a nice little natural colour scheme.
The Hero Design submitted
I submitted this design above, using a mixture of the animals and a lot of trees and foliage as well. I was really enjoying using these animals and motifs though, so I decided to create some designs to go along with it, I think this is a good practice to do just to practice making these families of designs. If I was doing this for a full collection I would have taken more time to do some more motifs, smaller motifs and maybe add a more contrasting colour into it. But working from this one hero is a task in itself to see what different things can come from it.
The Coordinating Patterns
So these show what I was playing with from that main design, and the repeat of it here at the bottom. While I think it is an obvious repeat, I do tend to stick to basic tile repeats for spoonflower as I want it to be easy to see in the tile when people are looking through and voting for designs. I could see this working for stationary or small giftware things like my main collection, I think this has given me some confidence in designing animal motifs that are not really realistic too as I want to be able to show some life and texture to them without them being boring and flat too.
Continuing to enter contests and take a few hours out of my week to do this regularly is helping me expand my work and practice pattern making while I am still in the mark-making stages of my collection.
I forgot about mushrooms when I did my second hand research last week, I did berries, fruit, nuts, acorns, even structures, but I think the mushrooms just slipped my mind. What reminded me was finding a mushroom in the garden so I photographed this then went onto Unsplash to find some other images of them that I could draw from.
Mushroom in the Garden
I do not really know anything about mushrooms, but I think they are quite interesting and it would be cool to learn about the different types of them that you could encounter in the wild.
Unsplash Images
I really like the variety in the images I found on Unsplash as I think it looks at a huge range of species that I think will be great for research and drawing.
I found I was actually coming to the end of my first sketchbook, I chose to focus on leaves and foliage in the one sketchbook, and use a different one for the animals, and the plan was to kind of combine them and work on motifs that incorporate both in whichever sketchbook has more room left in it. But right now I think I will start another A3 book to continue with the plants and foliage, because I have yet to start with the berries, nuts, acorns or structures development in my book.
I continued to explore some styles that I was enjoying using, and working on combining them and refining them, and considering how they would translate over to a more digital format as I plan to take my mark-making over to Procreate as well.
Sketchbook Pages
These pages show the continued experimentation with techniques that I think could work well for motifs, although I think I would have liked to try a thin dark green outline on the lighter green leaves for example to avoid the heavy use of black, but I found a sharpie was not achieving this look in the colours and the use of paint just would not achieve that thin perfect line that I wanted, but again this can be done on Procreate.
Favourite Leaves and Shapes
I took some of my favourite shapes of the leaves to use and to try and name a few of them. From here I knew I wanted to go ahead and play with the solid shape of it more that I touched on previously.
Experimenting with Techniques and shapes
I tried out some techniques here that represent the idea of shape a lot, such as the cut out and the patternwork shapes, I also tried an embroidery technique and a woven technique which I think helped to amplify the shapes and form of them more as the stitches defined the edges and the woven technique made from squares is quite obvious. I also tried the wax resist by drawing with a candle which was quite good to give a strong line drawing. I also went back to some of my favourite techniques such as the leaf skeletons, the splatter resist of the shapes and the bleach outlines too. I want to think of some ways to translate this better to Procreate and digital and see what I can do with it then.
Lino and Patterns
I worked agin with lino here but made sure they were cut out shapes that would make clear motifs, I then made such the veins were the right kind of shape on there, and went ahead and tried out some patterns with these, over watercolour and bleach backgrounds or just plain white to focus more on the motifs.
As a couple of weeks pass, I am finding more and more that things in the garden are changing. Things are growing and blooming, which is great for extra photos as I see them.
Pond Irises
The Iris plants by the pond came out in the last week, very bright and vibrant flowers with an unusual shape and pattern to them.
Wild Strawberry Plants
The wild strawberry plants a month ago looked like weeds, they were growing out of the paving and I nearly removed them, but now today the little strawberries have started to be more noticeable and there is actually quite a lot of them. Something I suppose will not last too long as I am sure birds and things will eat them before they have a chance to be fully ripe.
Dragonflies
Finally, these two dragonflies landed right next to me by the pond, after months of skulking around ponds looking for them in my last module and not really getting a successful image. Finally, a week after my deadline for Consultancy, I had the chance to get a close up picture of a couple of them. The same day I also encountered a monster dragonfly, I couldn’t get close to it, not that I wanted to anyway with the size of it!
When I was looking for research, I took a lot of my own photos myself, but I did come across a couple of issues where either plants and trees were not out or in bloom yet, or in the case of the animals, they are hard for me to find and could be invasive to actually get close up photographs of them.
I used Unsplash to look for some of these research images, as well as google with a filter that looks for images that are free to share and use, I will be using these photos for inspiration to draw and sketch from, not using the photo directly in my work.
Berries and Fruits
Berries and Fruits
I loved some of the images I got for these as they are well positioned within the frame and show leaves and things around them too, which make for good motifs. With the leaves too, just knowing which ones goes with which berry is great because I can use the berry as the centre and then make my own leaves around it as I know what they should look like. I think it is good to change around some things too because I have directly copied the composition of an image before and some folds and imperfections just do not translate well to the drawings and would look better if the leaf had been moved that tiny bit or unfolded.
Nuts and Acorns
Nuts and acorns
Nuts and acorns provide a vital bit of food for squirrels and dormice particularly, so I wanted to include these as motifs as I think these are quite important things to have. I also included some pinecones as these are common woodland things that the creatures would encounter a lot.
Shelters and Structures
OLYMPUS DIGITAL CAMERA
Structure research
Sheds, walls, stone barns, wooden fencing, all plays a vital part of the woodland creatures adventures through the world. I think the main thing is that they can be adapted to provide shelter, and if left abandoned by humans, they can be made much more wild and could be used by a variety of creatures. Hedgehogs will often make home in open sheds and bonfires quickly, so its important to make sure they are not in there before things like this are lit or closed up. The fencing and stone walls can be used as shelter and protection from predators or weather, so I think this is a vital part of their journey, it is also a common sight on the mountains or in the forests, falling apart because they are not maintained very well.
Hedgehog Images
Hedgehog images found on Unsplash
I wanted some hedgehog photos that showed the hedgehog in a couple of different positions as I think it would be nice to see in the pattern if there was a varied effect to it. I particularly like the picture of it walking as I have never really seen their legs before, I also like the ones curling up on their backs, its a very cute view. I need to experiment with the faces and things on them too as the effect of the face could make the pieces totally different, big eyes could look childlike.
Hare Images
Hare photos, found on Unsplash
The hare images were useful because the view of them fighting or standing in the field are so interesting, they have a range of poses but again the common one is just sat down looking. I think the ears are the best bit, they are so large and iconic to the animal I think this is a prominent feature that has to be shown in the images.
Red Squirrel Images
Red Squirrel photos, found on Unsplash
The red squirrel is an iconic animal, and I could have probably gotten an image if I went to locations nearby where they are known to live as I live in the buffer zone to their safe, grey-free zone. However with restrictions, this is difficult at the moment, same with hedgehogs, if I had put a camera outside a few months ago I might have been able to get a clear hedgehog image or video by now, as I think it has been such a slow process of finding the right places and narrowing down the locations where I might be able to find them. This gives a range of views of the creature too which is great for sketching out.
Dormouse Images
Dormouse images,found on Unsplash and Google
Again these images are great for a variety of positions, the dormouse is the cutest animal as well with its iconic large eyes and its unusual little tail.
Overall this research will really help me to get more studies and things done so I think I gain a better understanding of the creatures and can study things that I have not managed to get my own photos of in my limited area and in the last couple of weeks.
I wanted to create a website that I could expand as I produced more work, but creating it now means I have a lot less to do later on when I need it to be completed. I launched the website a couple of days ago after working on it for a couple of days before that.
Right now it shows a portfolio of my work which I will continue to add to, it also had a lot of my CV information in one place, links back to this blog, and has a domain name which I am pleased with.
The homepage shows my name, logo and my title. I think I do need to work on this page more and just add more hyperlinks on it, to important parts of my site. So far I added a link to my last module’s patterns, my CV and local inspiration of places around me.
My CV
My CV had not been updated since I applied for the Welcome Crew position last summer, so I had done a few things since then which was nice to add onto it. I kept my experience on here relevant to my field now, so I did leave out a couple of jobs in my gap year. Again this could be something I could adapt and add to easily, which is great to have where employers could access it easily if they wanted to. I would like to get a different photo, maybe of me doing my work or something as I do not have any photos where I look very professional in my field.
I took a CV workshop before and have been watching videos on a couple of different websites about CVs and job hunting, which I think were useful in me getting more serious about producing them. I worked on my LinkedIn too as it is now linked with my website, I found this quite hard as seeing there people’s can be quite intimidating, but I would like to start posting more on it.
I think having my website address now means I can put it on my business cards and get going with designing them as well.
I wanted to carry on taking part in the design contests, and the next one is Midsummer Festival, which when I researched, I found I was not getting a lot of ideas aside from flower crowns and the maypole. I chose a simple green and pink colour scheme as it worked well with all the greenery and flowers in the images.
I focused on the flower crowns as bold motifs in this display, I went with a similar method with the people as I did with the East Fork challenge a few weeks ago. I know I am not great at drawing faces and with this kind of graphic style anyway it worked better to leave the face plain to draw attention to the more detailed crown. I added little details like the eyebrows, eyelashes and lips as I think they set the face up with a couple of things in the right place, I also thought they would be the harder things to mess up. I think this design could have included another colour or something, but overall I do like it and the busyness of it overall.
I wanted to show a few of the specialist techniques I had tried out, we are given a document with a few specialist techniques in them and I generally try to give most of these a go and find a couple that worked for me. This time around I found that bleach was a good experiment, and also stippling as I think it creates a nice effect similar to the tattoo kind of style I enjoy using.
Cut Out Designs
Usually the leaf shapes here was interesting to cut out with the watercolour design inside them. I think the sycamore leaves were more interesting as it just has a ore interesting and rough shape to it.
Embroidery Drawing
I had a go at this technique which I have always wanted to try but have not found the right sort of way to go about it, I painted some designs onto paper here and then drew some stitches on, with the black I think these produced quite an interesting dark outline. I think the stitching is quite realistic in the way that it is not the same size every time and does not follow the lines exactly. I tried this in colours too as it is realistic to try to blend the stitches or co-ordinate them with the fabrics as well.
Woven Technique
I tried out this technqiue which describes filling in boxes to create an image, I found this quite difficult and it just reminded me of Minecraft honestly. It was quite relaxing to colour them in but I just do not like the effect of it overall.
My website is done! I’ll post about it tomorrow with some screenshots, the website was on the checklist of things to do to get the business cards done too, as I did not want to print them without a website address on them. I also did the logo a few weeks ago and refined this until I really liked it as I would not want to print them and decide on a small change to the logo. While business cards are part of the press packs, they would also be really useful for my little hair accessories that I sell as they would just look like a more professional package than my little handmade labels.
I have some sample packs of things ordered too so I can get the right feel of them, some of them have some interesting finishes on them and choosing this could be a step up in the quality depending on the prices of it.
VISAPRINT
I started on Visaprint and found that there were so many options for the business cards such as premium papers and shapes, I thought maybe start at the basic and see what else looks nice, maybe a figure of 100 will be good to look at throughout as it should keep a good guide on price then.
Using the most basic settings here with standard corners puts the price of 100 at £21.59, adding premium paper puts the price up another ten pound ish, and rounded corners by another 7-8 pound again.
Looking again at the range here shows some of the starting prices for the different business cards. This shows the various prices for 100 by paper quality and shape:
Standard: 21.59
Premium: 32.39
Spot UV: 37.59
Rounded Corner: 32.39
Square: 32.39
Folded 250: 38.38
Slim: 34.54
Then looking again the quality and finishes here there is a number of different effects. I assume too that these starting prices are just for these, so if a couple were to be combined it would go up again.
Metallic: 39.73
Ultra Thick: 75.57
Pearl: 58.30
Linen: 37.78
Textured Uncoated: 32.39
Natural Uncoated: 32.39
Kraft: 48.58
Recycled Matte: 37.78
Glossy: 32.39
Matte: 21.59
So I would probably just go for a standard one on Visaprint to keep the costs down for the first lot of them, maybe changing papers or something then when I have time to actually see them in person.
MIXAM
So I found these samples that I ordered which do display prices on the side, although they do seem to be very high numbers for the prices. The prices do seem very good for these but I think I will go on the website and see what 100 are, as the larger numbers can be a little misleading and the word from means there are a range of options to chose from, that price being the cheapest.
So I designed a business card here, made from 400gsm silk paper, with a matt finish on both sides and round corners, which came up as £17 for the 100 which I think is quite good and a little cheaper than Visaprint and even adding the extra features onto it. It is important to see though that the price sometimes does not change for the quanitites, for example I found that 50, 100, 150, 200 and 250 cards all cost the same prices so it is important to see what you can get for your money.
Printed.com
I found the sample packet for the Printed.com options, which had a handy list of all these things that they can print, which is useful for creating an actual presspack when I come to it as I would also need postcards and A5 flyers with my CV on it as well.
The business cards were shown like this with their details on them, just without pricing which I think is something useful to know when you are choosing a favourite in that moment.
Shown here there are a number of options for the cards, standard ones, foiled ones, white ink and spot UV, all of which give an extra bit of interest but it does immediately put the price up a bit.
Again I chose my options here that would be realistic but not pure simple cards, I chose a 400gsm silk paper with printing on both sides in colour and a matte laminate on one side with rounded corners. For the 100 cards it comes out at 16.30 which again is not a bad price for the added features.
MOO
Finally I also had a sample pack for Moo, I also went on their website to look for the prices. Shown here again there are a few different options immediately, original, cotton, super and luxe, all going up in price a little.
The pack included a couple of different shapes on the business cards, I do like the soft touch cards especially but they do usually cost a little more. Looking on the website there was around a 28 pound price tag for the set of 100, without any added features, although there was only really rounded corners which added a few pound onto the price right here.
Banner Buzz
Again not a lot of customisation that was easy to see with Banner Buzz, and 16.74 for the 100 went up quite quickly for double sided printing for example.
Instant Print
I tried a website called Instant Print where I found 100 basic cards were 17 pound which I think is good, but it went up to 24 with the rounded edges which I am starting to really like. I ave also ordered a sample pack of these to have a look at them before I decide.
Banana Print
I tried a 100 pack here that is double sided on 400gsm silk paper, with rounded edges and velvet laminated, which I think would be quite extreme but they would feel very nice. I will check if this can be ordered as a sample pack first I think but for 20.95 with those added features I do not think this is bad.
Bizay
I tried a quote with this site and it very quickly started adding up the price with thinner paper than everywhere else too it actually became the most expensive.
Zazzle
Again the price went up very quickly here with small extras, so probably not an option for me personally.
I will reach out to some local printers and see what their prices are as well, so I think this will give me an idea of prices in my local area. I think my best options to look into are probably Banana Print, Printed.com or Mixam would be better options for me to look into more.