I wanted to include some progress on my presspack, I think I will add it on a word document too as I do not want to post my address and mobile number online. The main thing I have done is write up some content within the presspack and produce a mockup of what it would look like complete with a folder and everything.
This mockup shows how I would like to have my presspack, the little pocket below my little welcome paragraph would be great for some little business card sized prints or a memory stick with images on them. The presspack includes the creative CV, personal statement and postcard, with my business card in the front too.
These show the business card and the postcard, I kept to the colour scheme and I think it works well. The postcard acts as a template too which could quite easily be swapped out and patterns changed depending on what collection I wanted to promote at that point. The business card I did have a little trouble designing, but a tutorial towards the start of my journey with Suzanna helped me to understand to keep things simple, and I do think these are far more effective than my previous designs.
I decided to get on and create the lookbook, and thought about some key decisions throughout which I will demonstrate below.
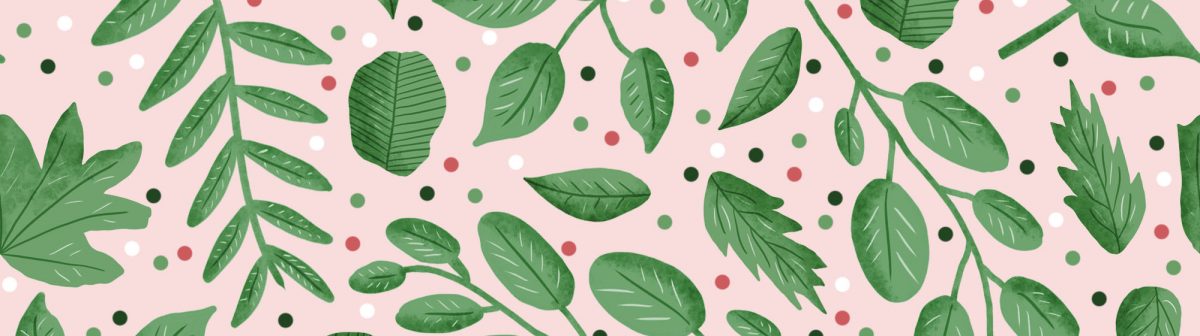
So I worked on the first few pages of my lookbook which I think was vital to get my branding into it, which is why I put my logo and my brand colours and pattern on the front cover. The green and pink foliage design is one that I use for headers on my professional websites, and on my business cards and other promotional material too. I also wanted to start adding some of my theme into it, so the dormouse header I think works well here, still keeping with the branding colours. I chose a blender design behind the collection statement, as it is a subtle way to introduce the collection as it begins.
The above is an example of a page each from the dormouse, hare and red squirrel collection, I used some coloured boxes on the pages to separate the collections from each other a little using one of their key colours. This helps to identify the secondary and blenders with their hero page I think. I considered whether to lay it out with the heros all together, then all the secondaries, then blenders, but I think the way I decided, showing each animal collection one after each other works well and I think it better shows the relationship between the heroes and the coordinating patterns, but still allows me to show some colourways that work across the whole collection, such as the dots blenders.
I like the use of the boxes, I think the plain white may have been too plain, so I think they do add something extra to the page without crowding it too much, and frames the patterns better too.
Overall, I am pleased with how my lookbook is going, once completed I plan to send it out to a few of my textiles friends, and some friends and family outside of the industry to get some feedback and opinions about it which I think is important for readability and professionalism, as well as meeting the marking criteria.
I went back over the briefs and what I could find as well when I was looking for some guidance on the lookbook, I was worried initially because of my Illustrator and Adobe Acrobat problems, however I decided this could be solved by completing my lookbook on Photoshop and automating a PDF document. I decided to use A4 pages for the covers front and back, and then an A3 sheet on landscape to create my double page spreads for the actual content of the book.
I knew I wanted my lookbook to show me as a developed designer, and also my conscious thinking towards the conservation and awareness aspect of my collection. I looked at some checklists and put together my own checklist of what I wanted to put into my lookbook.
– Introduction
– Index
– About Me
– Collection Statement
-My Unique Selling Point
– Each Collection
– Mockups
– Linesheets
– Contact Details
So with this in mind, I looked at my patterns and the colourways etc, and started thinking about how many things I could get onto each page. With my research in mind, I saw how the layouts can make a good difference, and while I would love to just have whole page images, I do not think this is possible with the amount of patterns I would be showing.
I made a plan of pages and what would be on each one in accordance to my new pattern boards I had created, I thought this would help me keep on track with colourways and everything too.
I also drew out some layouts for the type of pages I wanted to try, for example the main placement design has to be bigger, then the variations of the different animals for that style of placement will be a little smaller to show off the largest one as the main one in the collection.
I thought next I just needed to get into it and adapt it as I am going, some things look good in my head or on paper and I think until you actually do it, it can clash in weird ways and make things too busy or jarring.
I started hearing about lookbooks in second year, when first year students in textiles were doing them, I knew vaguely what it was but never really thought about making my own. It seems like quite a daunting task, a large book showcasing all my patterns and mockups, but also something that could be interesting to keep and put on my website to show others how my graduate collection came together.
I decided I wanted my lookbook to show me as a designer, and sell the unique aspect of my collection, being about the declining UK species. I decided to explore a couple of lookbooks in terms of layouts too to see what kind of thing I need to do.
Unfortunately the lookbooks that I have found online will not embed here, I tried surface pattern lookbooks as I thought fashion ones were a little different. The first one I came across was quite an attractive collection of print designs for fashion I believe it was, the layout I would say was very simple, but effective, usually one or two images to a double page, and mostly full of mockups that really showed the patterns, although for my lookbook, I do not think this will work. The pattern collection is large and including some variations on the placements and colourways on the secondary and blenders to show, there is a large number of patterns in the collection to fit into a book, and I would not want this to be so large that it would be boring to flick through. I want to come up with layouts that are interesting enough with two, three, even four designs to a page. I think the flat patterns will work well showing the collections grouped together, and also the mockups grouped together afterwards, as some could contain patterns from a mix of collections.
I found some examples of different types of lookbooks, from photography and products, to fashion in both men and women styles. Above shows quite a quirky fashion example, including words. I really like the idea of the faded coloured boxes, these could be used great for adding text and showing a separation between the four mini collections too, which I think is important. If you were to randomly flick to a page in it, you could notice the background colour, and then easily see the hero page also has that colour on the background.
I think ideally I would like to explore some typography tutorials too as I think this could be helpful to me, surface pattern design is not just pretty textiles, it is a graphic design and sometimes this will include more graphic elements, such as typography, layouts and lookbooks. Skillshare offers a range of tutorials so I will probably have a look on there, my last one I watched told me about contrasting fonts, using a bold, graphic design firstly for headings and titles, then a smaller, plainer font to contrast this which I think is really important to give it that professional look.
Using faded designs and backgrounds I think is great for adding an effective bit of branding and style into it, this is something I have seen on the more quirky lookbooks that are not just plain images and maybe a caption.
I love this lookbook for the dark contrast with the white, I think this is really important to have contrast, and I think I will try and take this away, even if it is using dark text against white or faded backgrounds. I also like how they were able to get a range of images on each page, so this being an A4 lookbook, the pages will actually be quite big and I think this will be good for viewing the patterns and not forcing them to be as big as they could be, making them fit nicer with the pages.
So I think my next step is to start planning out the lookbook on paper, knowing exactly what I want to get on each page in what order especially, then maybe sketch out some layouts that make sense and I think just get into doing it and trying things out to see what they look like.
After my critical look at the pattern boards I created from my designs, I had a chance to evaluate them and realised what I wanted to change, whether it was as simple as a colourway or scale, but also noticing too many similarities sometimes and changing it up with something a little different.
So the left one is the old board, and the right is the newer version. These actually look very similar because I was quite happy with the designs that I was producing and putting together here, but I did notice a few things. The placement design was correct for this board, but I changed the size of the dots behind the dormouse which is more consistent now with the other animals in this placement style, I think this does look better for the front of a notebook or cushion like I wanted.
The secondaries I thought had a good background colour spread, but they were all showing mushrooms. I changed one of these to a berry design, and then changed the colourway of the bottom pattern to avoid too much pink. I thin the design at the bottom works well for both pink and green so I will put both colourways into my lookbook. Finally I looked closely at scale for the blenders and I think it has made more of a difference, I think it changes it from a busy pattern to more of a texture sometimes, which makes it look much more like a blender.
Again older board on the left, and newer on the right. I decided to put a different type of placement design on each board, so the hare represents the bottom corner placement. The middle placement from the first board will be shown as a variation of the middle placement, on the dormouse placement page in my lookbook. I looked at scale on my secondaries, showing more of the hares and brought the scale of the ferns up a little. With the blenders, I have brought the mushroom one down in scale, and I just did not like the leaf repeat, so I created a new one, that was more sparse and spread out.
The old design on the left has a number of designs on it, I think my hedgehog collection was the biggest and had a lot of different designs that I did not use and edited down too. The right shows the updated board, using the top corner placement and the green hero. I swapped the bottom secondary on the old board to a smaller scale and made it a blender instead, which I think works because of its scale and the two colours. I added a berry design as the secondaries were populated by leaves, a similar problem to the Dormouse having all the secondaries as mushrooms. I changed the colourway of the top blender to avoid a majority pink background collection with the blenders. I also adjusted the scales on the linear leaves and the new sycamore blender from the secondary column previously.
The old board on the left here shows the middle placement which will now be shown with the dormouse placement as that is the board the placement style is represented on, for this one I switched to the header design, which I think is quite dynamic for the squirrel as they symmetrically jump away from each other with their nuts. This allowed me to show a little more of the heroes here. I liked my top two secondaries, the middle one has a lot of variation on colourways and alternatives too. I did not like the bottom secondary design, I just did not love it and noticed all three of the secondary were tossed. So I decided to swap this with this new linear design with the yellow foliage. I adjusted the scales on the top two blenders here and replaced the third one as I just did not like it, I think there were too many colours in it for the blender, so I swapped it with this simple nuts repeat which works well with the theme.
Overall I think these are far better designs now and work well as collections, I am excited to get started on the lookbook and put these together in a more professional context.
I decided that since some time has passed now since I finished my patterns, I would like to go back over them with fresh eyes and try and see any problems with them. I remember in Consultancy, I would create the pattern board, show it to Helen, and she would make comments to improve it, and this process continued which I think was a massive help for me understand exactly what I had to do to improve my work and meet criteria.
So with scale and colour in mind, I went back over my pattern boards, I know some things I already wanted to change, such as changing the placement on each pattern board to a different one, so I was able to show more diversity in my collection. I also considered this with my blenders, I have blenders using dots for every little collection but only showing that on the one board with a range of colourways allows room on the other collection boards for a different style of simple blender, the dormouse for example using squiggles from the mushrooms, the hedgehog using small sycamore leaves etc.
The Hedgehog Collection Board
So as shown here, I decided I was happy with the hero design and the half drop style hedgehog secondary, although I think I need to reposition it, and with this one I need to put the top corner placement of the hedgehog on this board instead of the header placement, as the header placement will be displayed on the squirrel board instead.
I was happy with two of the middle secondaries, I have been using these throughout the mockups I have started creating too, the bottom one however does seem a step down, but not quite a blender, I might discuss leaving this in but adding another secondary design as I think they all represent leaves, instead of the berries and other things.
I think the blenders, the top one is very unique within the collection but I think there is too much pink in the backgrounds here so I think reversing the pink and the green in the top blender will help that. I think the last blender may need to be a little bit of a smaller scale to it, so I think this will be useful to make it look more like a blender too.
Red Squirrel Collection
The next one is the red squirrel collection, I said again here I was happy with the hero design but the placement design needed to be changed to the header placement design and actually change it to a yellow and blue design, to differ it more from the hedgehog patterns, I was happy with the secondaries as they differ in scale and colour, I was just unsure whether it matter that they were all tossed, maybe the middle and bottom one could have been the same pattern just coloured different and slightly scaled up, so maybe I could look into a different secondary design for this one here, as I do not like the blue and yellow one anyway.
The blenders I said I was happy with the dots, I have colourways for this one that covers the whole collection too. The top two I said could use a smaller scale I think, and the third one down I think maybe needs less colours, or to switch to a blender I created using the nuts designs.
Dormouse Collection
The dormouse collection was the first I created, and the mushrooms were made first out of all of the patterns. The placement design is right here but I discussed earlier that I need to alter the size of the dots a little. I am happy with the hero again but the secondary designs do all contain mushrooms, although I do like the variety of background colours. I do have a nice berry design that I could use instead I think, so maybe use that as a pink background, and then the bottom secondary just with a green background instead.
My notes for the blenders were to try a slightly smaller scale for the three of them as I think it would be more effective.
Hare Collection
The placement design is the corner one here and I think this is quite effective and interesting, I am happy with the hero design, but the secondaries I think the top one could be altered to a different background colour and a slightly smaller scale to show a few more of the hares within it. I think I am happy with the other two and one of the blenders, however I think a smaller scale on the mushroom will show it as a more textured appearance. The middle one was originally green leaves, and I just think it looked a little too much like a cannabis leaf at a quick glance, so I changed the colour of this, but I just do not think it goes very well with the collection as a whole. I thought about a tossed design but then it could just look more like the secondary, so maybe trying blue leaves on a white background or something on a smaller scale.
So the next step will be to make these changes, and I think then I would be in a good place to put them together and see how they all look as a collection, and maybe ask around for some opinions on further improvements.
I have been consisting putting this wildlife camera out around the garden since the start of lockdown, so around 4 months now I think? I have been changing around locations, positions, height of the camera, looking across the grass, looking down the paths, going inside sheds and little hedgehog houses ive built around the garden, and there was no activity that I wanted for so long. I would get cats, mice, squirrels, birds, which was amusing to see and quite interesting sometimes about what was in the garden that I did not really know about. Last week I started putting dog biscuits out in a hedgehog house, and even though I would not get any videos, the food would be gone and the bowls pushed around, so I checked the camera and the battery was so low that the night vision had stopped working.
I replaced the batteries over the weekend and put it back into the hedgehog house with some more food last night.
I was so thrilled to find the hedgehog last night eating away on some biscuits, proving I have been able to encourage them in the garden and can continue to provide it with food and water now and see if I can keep him and any more. I notice that the biscuits seem a little big for him and he struggled to keep it in his mouth, so I could look at crushing them a little, although I do not want to make it too easy for the mice to eat all of it, as they did seem to finish it off between 1 and 2 after the hedgehog had been in twice, the hedgehog then returned at around 4:11 and you can see it sniffing around and looking for food, whether this is the same one or different I am not sure. I can continue now to see if the hedgehog coming in and out looks different, and maybe trace where it comes from using the camera outside of the house too.
I was excited to see my designs on a larger range of things after doing a few that I found online, I collected what I needed, notebooks, a mug and coaster, some more stationery, even a phone case, and I managed to create some simple mock up images from these by setting up a little white light area. I think these kind of images show the patterns very well against a white background and I think this is probably how I would show them on a product listing too.
I first had a go at some notebooks here, which was great because it has given me a chance to put different patterns together and see how they work together. I also had a pen and pencil in some images that I think look good with a little blender design to go onto them. The advantage of doing my own mockups means that I can arrange them right, I can open the notebook or anything else and get the best images that I need. So I did open a notebook and put a blender on the inside cover and a light blue page with a placement design sat in the corner which I think looks cute.
I next tried some images using a mug and coaster, a pen holder and some notebook together which I think looks quite good together. They all work as good giftware items which is exactly what I want my collection to be. I think overall the mockups are great and have made me think more about what I want to ensure my patterns do, this includes scale, colourways, and I think I can look into editing designs now to make them exactly what I want them to be.
I am constantly on the lookout for contests to do, I enjoy it as well as getting more of my work out there and seeing what patterns etc are successful. The Wraptious contest is designing for cushions and art prints, two products that I would actually love to create using my own designs, so this was a perfect chance to do just that, using five designs that I am quite proud of.
The designs are shown on the site by displaying them on mockups on the framed prints and cushions. I decided to include the hedgehog hero design, I think it is very effective with its bright colour and half dropped design. The red squirrel placement is cute and I think works well on a cushion and an art print, I also used a secondary from the red squirrel collection with the bright foliage, and then I looked at my contest designs, the ice lollies and British owl designs I think look great on products, I havent seen them on products due to just doing them for flat patterns so this was great to see.
The contest is judged on votes via facebook likes and shares, an update if anything happens.
When I saw the name of this contest, I thought it was one that I might have to skip, as I do not like sports and I could not think of anything beyond different balls or rigid sporting equipment. Then I thought of swimming, which is kind of a sport and also leisurely as a lot of people do it for fun and exercise. The leisure part I think is important, it could be anything from walking a dog to doing yoga, leisure time covers a range of things.
I developed from swimming and thought of snorkelling under the water, where you could interact more with sealife and animals, so I decided to go with this, as it gave me a chance to think about a variety of underwater animals too.
I drew up some girls exploring underwater and used this to show the idea of someone doing the activity, I liked doing this as I do not do a huge amount of people and this gave me a chance to practice, by hiding the faces with their big goggles too, it was great. I surrounded them with sealife, and I think this gives it an interesting and busy look to it. I entered the large bottom one here into the contest.
I created a lot of coordinating designs to go along with this, which I will work on more and repeat to give a better idea of scale.
I created quite a large collection from this and I think I could probably still do more, I played with all the different motifs, experimenting with colourways and scale a lot throughout.